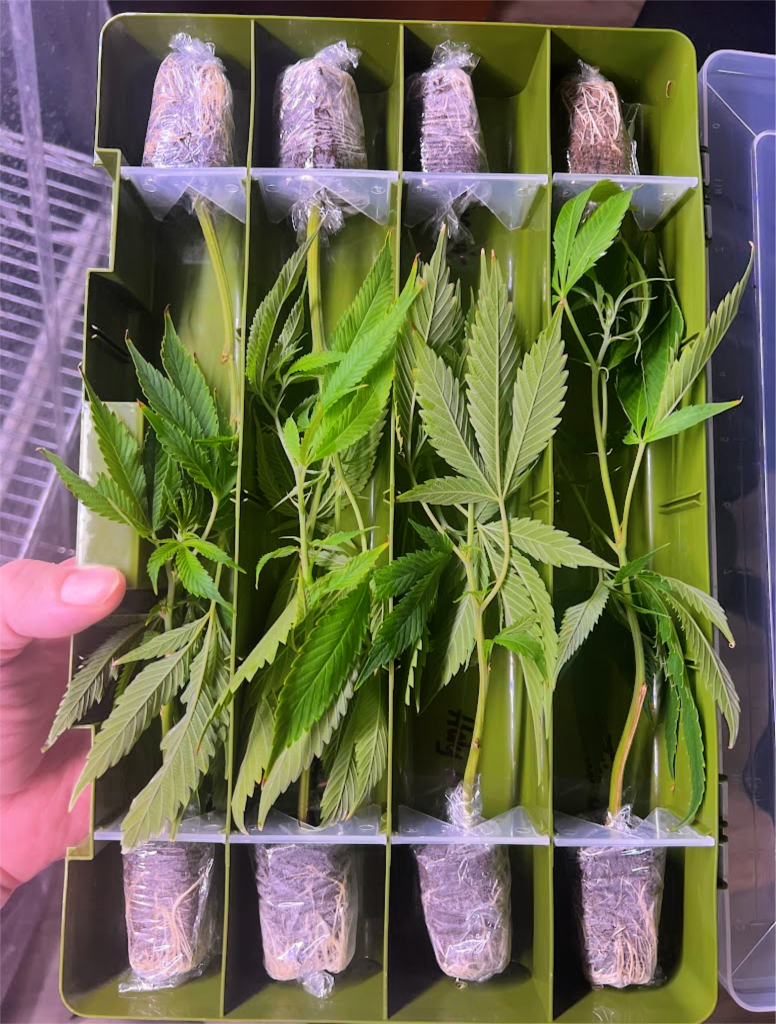
Complete Seed Growing Guide
From Seeds to Harvest - Everything You Need to Know
Getting Started: Essential Topics for Beginners
Supplies & Equipment
Comprehensive lists of everything you need for both indoor and outdoor growing operations, from basic essentials to advanced equipment for optimal results.
Growing Environment
Learn the critical requirements for space, lighting, ventilation, and environmental controls that ensure healthy plant development from seed to harvest.
Plant Care & Training
Master essential techniques including topping, pruning, LST, and advanced training methods like SCROG and SOG for maximum yields and plant health.
Feeding & Nutrition
Understand proper watering schedules, nutrient requirements, pH management, and foliar feeding techniques for each stage of plant growth.
Pest Management
Comprehensive pest identification guide with natural and organic prevention strategies, plus effective intervention methods when problems arise.
Problem Solving
Professional troubleshooting advice for common growing challenges including nutrient deficiencies, environmental stress, and disease management.
Complete Supplies Checklist
Having the right equipment is crucial for successful cultivation. This comprehensive list covers everything you'll need for professional-quality results.
Indoor Growing Essentials
- Grow Tent or Dedicated Space: Minimum 2-4 square feet per plant, adjustable for strain size and training methods
- Professional Lighting System: LED (most efficient), HID (high intensity discharge), or T5 fluorescent options based on budget and heat management needs
- Complete Ventilation Setup: Exhaust fans (CFM rated for tent size), intake fans for air circulation, carbon filters for odor elimination
- Climate Control Equipment: Digital thermometer/hygrometer combo, space heater for cold climates, oscillating fans for air movement
- Growing Medium Options: Premium soil blends, coco coir with perlite, or complete hydroponic systems (DWC, NFT, or aeroponic)
- Nutrient Systems: Base nutrients (20-20-20 for vegetative growth), bloom boosters, pH adjustment solutions, TDS/EC meter
- Containers: Minimum 3-gallon pots (5-7 gallons recommended), fabric pots for better root development, drainage trays
Outdoor Growing Essentials
- Site Preparation: Full-sun location (6-8 hours daily), well-draining soil, wind protection consideration
- Soil Enhancement: Organic compost, aged manure, perlite for drainage, mycorrhizal fungi inoculant
- Water Management: Drip irrigation system, soaker hoses, mulch for water retention, rain gauge for monitoring
- Plant Support Systems: Heavy-duty tomato cages, bamboo stakes, trellis netting for large plants
- Pest Control Arsenal: Companion plants (marigolds, basil), beneficial insect houses, organic pesticides
- Weather Protection: Row covers for unexpected temperature drops, windbreaks, greenhouse for season extension
Universal Tools & Equipment
- Quality Genetics: Purchase seeds or clones from reputable sources like getseedsrighthere.com - always verify local cultivation laws
- Precision Instruments: Digital pH meter with calibration solutions, TDS/EC meter, soil thermometer
- Pruning & Training Tools: Sharp pruning shears (sterilizable), soft plant ties, LST clips, trellis netting
- Safety & Sanitation: Nitrile gloves, isopropyl alcohol for sterilization, eye protection when using sprays
- Documentation: Growing journal, camera for progress photos, measuring tape, labels for plant tracking
- Harvest Equipment: Trimming scissors, drying racks, mason jars with humidity packs, digital scale
Seed Germination Mastery
Proper seed germination is the foundation of a successful grow. Follow these detailed steps for maximum germination rates and healthy seedling development.
Pre-Soak Preparation
Duration: Soak seeds in room temperature, pH-balanced water (6.0-7.0) for 2-6 hours maximum.
Water Quality: Use filtered, distilled, or RO water to avoid chlorine and contaminants that can inhibit germination.
Temperature: Maintain water temperature at 68-72°F for optimal absorption without shocking the seeds.
Selection: Viable seeds will sink to the bottom. Floating seeds may still germinate but have lower success rates.
Germination Medium Setup
Paper Towel Method: Use unbleached, lint-free paper towels dampened with the same pH-balanced water used for soaking.
Moisture Level: Towels should be moist but not dripping. Excess water can cause seeds to rot before sprouting.
Environment: Place between two plates or in a sealed container to maintain humidity while allowing air exchange.
Dark Location: Store in a warm, dark place like the top of a refrigerator or use a germination heat mat set to 75-80°F.
Monitoring Germination Progress
Timeline: Most viable seeds will crack and show a taproot (radicle) within 24-72 hours under optimal conditions.
Daily Checks: Monitor moisture levels daily and add water if towels begin to dry out. Maintain consistent humidity.
Taproot Development: Allow taproot to grow to 0.5-1 inch before transplanting for best establishment success.
Temperature Maintenance: Consistent temperature is crucial. Fluctuations can slow or halt germination.
Transplanting Sprouted Seeds
Planting Depth: Plant sprouted seeds 2-5mm deep in pre-moistened growing medium with taproot pointing downward.
Medium Selection: Use light, airy seed starting mix or create your own with peat moss, vermiculite, and perlite.
Container Size: Start in small containers (solo cups with drainage holes) to prevent overwatering and root problems.
Gentle Handling: Use tweezers or carefully handle by the seed casing, never touch the delicate taproot.
Seedling Care & Environment
Moisture Management: Keep growing medium consistently moist but never waterlogged. Use a spray bottle for gentle watering.
Humidity Dome: Cover with clear plastic dome or wrap to maintain 70-80% humidity during first week of growth.
Temperature Control: Maintain 68-77°F for optimal growth. Use heating mats if necessary to achieve consistent temperatures.
Air Circulation: Provide gentle air movement once seedlings emerge to strengthen stems and prevent damping-off disease.
Light Introduction Protocol
Initial Lighting: Start with low-intensity lighting (T5 fluorescents or LED at 50% power) placed 18-24 inches above seedlings.
Gradual Increase: Slowly increase light intensity and decrease distance over 7-10 days to prevent light burn.
Photoperiod: Maintain 18/6 or 20/4 light schedule for vigorous vegetative growth.
Signs of Success: Healthy seedlings show bright green cotyledons and first true leaves within 5-7 days.
Creating the Perfect Growing Environment
Environmental control is the foundation of successful cultivation. Proper management of these factors will determine the health, yield, and quality of your harvest.
Indoor Environment Optimization
Space & Layout Planning
Space Requirements: Allocate 2-4 square feet per plant for standard varieties, up to 6 square feet for large sativa strains or when using advanced training techniques.
Layout Strategy: Position plants to maximize light exposure while maintaining adequate spacing for air circulation. Plan for plant growth - they can triple in size during flowering.
Access Considerations: Leave pathways for daily maintenance, watering, and harvest activities. Overcrowding makes pest detection and treatment difficult.
Advanced Lighting Systems
LED Technology: Full-spectrum LEDs offer energy efficiency and low heat output. Look for lights with adjustable spectrum and intensity controls.
Light Intensity: Vegetative stage requires 400-600 PPFD, flowering stage needs 600-900 PPFD. Use light meters for precise measurements.
Photoperiod Management: 18/6 or 20/4 light schedule for vegetative growth, 12/12 for flowering. Maintain strict dark periods with no light leaks.
Irrigation & Automation
System Selection: Drip irrigation for precision feeding, hand-watering for small setups, hydroponic systems for maximum control.
Automation Benefits: Timer-controlled systems ensure consistency and free up time for other cultivation tasks. Include fail-safes for power outages.
Water Quality: Use filtered water, maintain proper pH levels, and consider water temperature for root health.
Humidity Control Mastery
Vegetative Stage: Maintain 40-70% relative humidity to promote healthy leaf development and nutrient uptake.
Flowering Stage: Reduce to 40-50% RH to prevent mold and mildew issues as buds develop density.
Equipment Needed: Accurate hygrometers, dehumidifiers for high humidity, humidifiers for dry conditions, and proper ventilation for air exchange.
Temperature Management
Optimal Ranges: Vegetative growth thrives at 70-85°F (21-29°C), flowering stage prefers slightly cooler 65-80°F (18-27°C).
Consistency is Key: Avoid temperature swings greater than 10°F. Use thermostats and climate controllers for precise regulation.
Night Temperature: Allow 5-10°F drop during dark periods to simulate natural conditions and promote healthy development.
Air Circulation & Ventilation
Fresh Air Exchange: Replace tent air every 3-5 minutes using properly sized exhaust fans rated for your space volume.
Internal Air Movement: Use oscillating fans to strengthen stems, prevent hot spots, and reduce pest issues.
Carbon Filtration: Install carbon filters on exhaust systems to eliminate odors and maintain discretion.
Outdoor Environment Considerations
Site Selection & Preparation
Sunlight Exposure: Choose locations with 6-8 hours of direct sunlight daily. South-facing slopes are ideal in northern climates.
Space Planning: Allow 4-6 square feet per plant minimum, more for large varieties or when using training techniques.
Privacy & Security: Consider neighbor visibility, local regulations, and security measures for your outdoor garden.
Soil Preparation & Management
Drainage Requirements: Cannabis roots need oxygen-rich soil. Improve clay soils with perlite, sand, and organic matter.
Soil Enhancement: Mix in compost, aged manure, and mycorrhizal fungi to create a living soil ecosystem.
pH Testing: Test soil pH regularly and amend as needed. Cannabis prefers slightly acidic to neutral soil (6.0-7.0 pH).
Climate Adaptation
Temperature Tolerance: Cannabis thrives in warm climates with day temperatures between 70-85°F and cooler nights.
Humidity Management: In high humidity regions, increase spacing between plants and ensure good air circulation to prevent mold.
Season Extension: Use row covers, cold frames, or portable greenhouses to extend growing seasons in cooler climates.
Weather Protection Strategies
Wind Protection: Strong winds can damage plants and increase water needs. Use windbreaks or natural barriers.
Rain Management: Excessive rain during flowering can cause mold issues. Consider temporary covers during wet periods.
Extreme Weather: Have plans for heatwaves, unexpected frost, and severe storms that could damage or destroy crops.
Advanced Plant Care & Training Techniques
Proper plant training and care techniques are essential for maximizing yields, improving plant health, and managing garden space efficiently.
Fundamental Training Methods
Topping Technique
Purpose: Redirects plant energy from vertical to lateral growth, creating multiple main colas and a bushier plant structure.
Timing: Perform during vegetative stage after plant develops 3-5 nodes and establishes a strong root system (usually 3-4 weeks from germination).
Method: Using sterilized sharp scissors, cut just above a node where new growth emerges. This removes apical dominance and encourages lateral branching.
Recovery: Allow 7-10 days between topping sessions. Plants may show slight stress initially but will resume vigorous growth.
Strategic Pruning
Selective Defoliation: Remove large fan leaves that block light penetration to lower branches and developing bud sites.
Timing Considerations: Light pruning throughout vegetative growth, moderate pruning in early flowering (weeks 1-3), minimal pruning after week 4 of flowering.
Benefits: Improved light distribution, better air circulation, reduced mold risk, and energy redirection to productive growth.
Technique: Remove no more than 20% of foliage at one time. Focus on older, yellowing, or damaged leaves first.
Low Stress Training (LST)
Concept: Gently bend and secure branches to create an even canopy without cutting or damaging the plant.
Implementation: Use soft plant ties or LST clips to gradually bend branches outward, exposing more bud sites to light.
Benefits: No recovery time needed, suitable for autoflowering varieties, creates multiple main colas.
Maintenance: Adjust ties regularly as plants grow, ensuring no branches are restricted or damaged by tight ties.
Super Cropping
Advanced Technique: Carefully damage the internal structure of branches without breaking the outer skin to control height and increase yields.
Method: Gently squeeze and bend branches until you feel the internal fibers break, then support the branch as it heals.
Recovery: Plants typically recover within 3-7 days and often show increased vigor at the bend point.
Caution: Practice on less important branches first. Not recommended for beginners or autoflowering varieties.
Advanced Training Systems
SCROG (Screen of Green)
Setup: Install horizontal screen or net 20-25 inches above growing medium. Use fewer plants (1-4) with longer vegetative period.
Space Requirements: Allocate 3-4 square feet per plant to allow full canopy development through the screen.
Management: Weave branches through screen openings, maintaining even canopy height. Continue training until screen is 75% full.
Benefits: Maximizes light efficiency, creates uniform cola development, ideal for limited height spaces.
SOG (Sea of Green)
Concept: Use many small plants (1-2 square feet each) with minimal training to create a canopy of uniform colas.
Plant Count: Higher plant count with shorter vegetative time. Switch to flowering when plants are 12-18 inches tall.
Container Size: Use smaller pots (1-3 gallons) as plants don't need extensive root systems.
Advantages: Faster harvest cycles, reduced vegetative time, uniform cola development, easier management.
Advanced Defoliation (DEFOL)
Strategic Timing: Major defoliation sessions at day 1 of flowering and day 21 of flowering for maximum benefit.
Technique: Remove fan leaves that don't contribute to energy production, focusing on interior and lower growth.
Benefits: Improved light penetration, better air circulation, larger bud development, reduced larfy (small, underdeveloped) buds.
Recovery: Plants typically recover within 3-5 days and show increased flower production.
Lollipopping Technique
Method: Remove all lower growth below the canopy level to create "lollipop" shaped plants with energy focused on top colas.
Timing: Perform during early flowering (weeks 1-2) to redirect energy before buds fully develop.
Benefits: Eliminates small, low-quality buds; concentrates energy on main colas; improves air circulation at plant base.
Maintenance: Monitor for new lower growth throughout flowering and remove as needed.
Professional Watering & Nutrition Management
Proper water and nutrient management is critical for healthy plant development and maximum yields. Understanding these fundamentals will prevent most common growing problems.
Water Quality & pH Management
Water Quality Standards
pH Range: Maintain water pH between 6.0-7.0 for soil grows, 5.5-6.5 for hydroponic systems.
Water Sources: Use filtered, RO, or distilled water to eliminate chlorine, chloramines, and dissolved solids that can harm beneficial microorganisms.
Testing Equipment: Invest in a quality digital pH meter with automatic calibration and TDS/EC meter for nutrient concentration monitoring.
Adjustment Solutions: Use pH Up (potassium hydroxide) and pH Down (phosphoric acid) to maintain optimal ranges.
Watering Frequency & Techniques
Soil Moisture Testing: Check moisture levels by inserting finger 1-2 inches into growing medium. Water when top layer feels dry.
Container Weight Method: Lift pots to gauge water needs - lighter containers indicate need for watering.
Watering Technique: Water slowly and thoroughly until 10-20% runoff appears at drainage holes, ensuring complete root zone saturation.
Frequency Guidelines: Young plants may need daily watering, mature plants typically every 2-3 days depending on environmental conditions.
Drainage & Root Health
Container Requirements: Ensure all containers have adequate drainage holes to prevent waterlogging and root rot.
Growing Medium: Use well-draining soil mixes with perlite, pumice, or similar amendments for proper aeration.
Runoff Management: Allow excess water to drain completely. Standing water in saucers can lead to root problems.
Signs of Problems: Overwatering symptoms include yellowing leaves, musty odors, and slow growth. Underwatering shows wilting and dry soil.
Temperature Considerations
Water Temperature: Use room temperature water (65-75°F) to avoid shocking plant roots with extreme temperatures.
Seasonal Adjustments: Cold water can slow nutrient uptake in winter, while hot water can damage root systems in summer.
Storage: Prepare water 24 hours in advance to allow chlorine to evaporate and temperature to stabilize.
Hydroponic Systems: Maintain reservoir temperatures between 65-72°F for optimal dissolved oxygen levels.
Advanced Nutrition Programs
Vegetative Growth Nutrition
N-P-K Ratio: Use nitrogen-rich fertilizers (20-20-20 or similar) to promote vigorous leaf and stem development.
Feeding Schedule: Feed every watering or every other watering depending on nutrient concentration and plant needs.
Micronutrients: Ensure adequate calcium, magnesium, and trace elements through quality base nutrients or supplements.
Organic Options: Fish emulsion, kelp meal, and compost teas provide slow-release organic nutrition.
Flowering Stage Feeding
Nutrient Transition: Switch to phosphorus and potassium-rich formulations (lower nitrogen) during flowering transition.
Bloom Boosters: Use specialized flowering nutrients to maximize bud development and essential oil production.
Feeding Intensity: Gradually increase nutrient concentration as plants develop larger root systems and higher demands.
Flush Period: Use plain, pH-balanced water for final 1-2 weeks to improve flavor and burn quality.
Foliar Feeding Techniques
Application Timing: Spray foliar nutrients during lights-off period or early morning to prevent leaf burn.
Spray Concentration: Use quarter-strength nutrient solutions to prevent leaf damage while providing quick nutrient uptake.
Coverage Method: Spray undersides of leaves where stomata are located for maximum absorption.
Frequency: Apply foliar feeds 1-2 times per week during vegetative growth, reduce during flowering to prevent mold issues.
Nutrient Problem Prevention
Regular Monitoring: Test runoff pH and EC levels to monitor plant uptake and prevent nutrient lockout conditions.
Gradual Changes: Make feeding adjustments gradually over several days rather than dramatic changes that can shock plants.
Environmental Factors: Higher temperatures and lower humidity increase nutrient demands and watering frequency.
Record Keeping: Maintain detailed feeding logs to identify successful programs and troubleshoot problems.
Comprehensive Pest Prevention & Management
Integrated Pest Management (IPM) combines prevention, monitoring, and targeted interventions to maintain healthy plants while minimizing chemical inputs.
Prevention Strategies
Regular Monitoring Protocol
Daily Inspections: Check plants daily for early signs of pest activity, focusing on new growth and leaf undersides.
Weekly Deep Inspections: Thoroughly examine all plant parts including stems, soil surface, and growing area for pest evidence.
Documentation: Keep detailed records of pest observations, treatments applied, and environmental conditions.
Early Detection Tools: Use magnifying glasses or jeweler's loupes to spot small pests like spider mites and thrips.
Environmental Controls
Cleanliness Protocol: Maintain sterile growing environment by removing dead plant matter, cleaning tools, and sterilizing surfaces regularly.
Air Circulation: Ensure proper ventilation to prevent stagnant air conditions that favor pest development.
Quarantine Procedures: Isolate new plants for 1-2 weeks before introducing to main growing area to prevent pest introduction.
Physical Barriers: Use fine mesh screens on intake vents to prevent flying pest entry into growing spaces.
Biological Prevention
Companion Planting: Integrate marigolds, basil, mint, and other aromatic plants that naturally repel common cannabis pests.
Beneficial Insect Habitat: Provide habitat for beneficial insects with diverse flowering plants and insect hotels.
Predator Introduction: Release beneficial insects like ladybugs, predatory mites, and lacewings for natural pest control.
Soil Health: Maintain healthy soil microbiome with compost and mycorrhizal fungi to support plant immune systems.
Cultural Practices
Plant Spacing: Adequate spacing improves air circulation and reduces humidity that favors pest development.
Stress Reduction: Maintain optimal growing conditions as stressed plants are more susceptible to pest attacks.
Genetic Selection: Choose pest-resistant varieties when available and maintain genetic diversity in breeding programs.
Seasonal Timing: Plan planting schedules to avoid peak pest activity periods in your region.
Common Pest Identification & Management
Soil-Dwelling Pests
Fungus Gnats: Small flying insects with larvae in soil. Control with yellow sticky traps, beneficial nematodes, and soil surface drying.
Root Aphids: White, waxy insects on roots causing wilting. Treat with predatory mites, neem oil soil drenches, and improved drainage.
Management: Use diatomaceous earth around plant bases, maintain proper soil moisture, and introduce beneficial soil organisms.
Chewing Pests
Caterpillars: Various species that chew leaves and stems. Hand-pick when possible, use Bacillus thuringiensis (BT) for organic control.
Japanese Beetles: Metallic green beetles that skeletonize leaves. Use pheromone traps away from plants and beneficial nematodes for grub control.
Grasshoppers: Large insects that can cause significant damage. Use row covers, beneficial birds, and targeted sprays during nymph stage.
Sucking Pests
Aphids: Small, soft-bodied insects that cluster on new growth. Control with ladybugs, lacewings, or insecticidal soap sprays.
Spider Mites: Tiny pests causing stippled leaves and webbing. Increase humidity, use predatory mites, or miticide sprays.
Whiteflies: Small white flying insects on leaf undersides. Use yellow sticky traps, beneficial wasps, or reflective mulches.
Thrips: Tiny, elongated insects causing silvery leaf damage. Control with predatory mites, blue sticky traps, or spinosad sprays.
Treatment & Intervention Methods
Organic Pesticide Options
Neem Oil: Broad-spectrum organic pesticide and fungicide that disrupts pest life cycles. Apply during lights-off periods to prevent leaf burn.
Insecticidal Soap: Gentle treatment for soft-bodied insects like aphids and spider mites. Safe for beneficial insects when properly applied.
Horticultural Oils: Suffocate pests and disrupt feeding. Effective against scale, mites, and aphids with minimal environmental impact.
Plant Therapy by Lost Coast: Recommended broad-spectrum organic treatment effective against multiple pest types.
Physical Control Methods
Yellow Sticky Traps: Monitor and control flying pests like fungus gnats, whiteflies, and thrips. Place at canopy level for maximum effectiveness.
Diatomaceous Earth (DE): Food-grade DE creates physical barriers that dehydrate crawling insects. Apply to soil surface and plant bases.
Hand Removal: Physical removal of larger pests like caterpillars and beetles is often the most effective immediate control.
Water Sprays: High-pressure water can dislodge aphids, mites, and other small pests while cleaning plant surfaces.
Biological Controls
Bacillus Thuringiensis (BT): Natural bacteria that specifically targets caterpillars without harming beneficial insects or plants.
Predatory Mites: Effective biological control for spider mites, thrips, and other small pests. Establish populations before pest problems develop.
Beneficial Nematodes: Microscopic worms that control soil-dwelling pests like fungus gnat larvae and root weevils.
Parasitic Wasps: Tiny wasps that parasitize aphids, whiteflies, and other soft-bodied pests without stinging humans.
Integrated Treatment Approach
Isolation Protocol: Immediately isolate infected plants to prevent pest spread to healthy specimens.
Selective Pruning: Remove heavily infested plant parts to reduce pest populations and improve treatment effectiveness.
Treatment Rotation: Rotate between different control methods to prevent pest resistance development.
Recovery Monitoring: Continue monitoring treated plants for several weeks to ensure complete pest elimination.
Professional Troubleshooting Guide
Quick identification and correction of common growing problems is essential for maintaining healthy plants and achieving optimal yields.
Nutrient Deficiencies
Common Causes: Incorrect pH preventing nutrient uptake, over/under-watering disrupting root function, damaged irrigation systems in hydroponic setups.
Identification: Yellowing leaves (nitrogen), purple stems (phosphorus), brown leaf edges (potassium), interveinal chlorosis (iron/magnesium).
Solutions: Test and adjust pH to optimal range (6.0-7.0 soil, 5.5-6.5 hydro), correct watering practices, flush and restart nutrient program if necessary.
Prevention: Regular pH and EC monitoring, consistent feeding schedules, quality water sources, proper nutrient storage.
Watering Problems
Overwatering Symptoms: Yellowing leaves, musty soil odor, slow growth, wilting despite wet soil, fungal growth on soil surface.
Underwatering Signs: Wilting leaves, dry soil, stunted growth, crispy leaf edges, rapid soil moisture loss.
Immediate Actions: Adjust watering frequency based on soil moisture testing, improve drainage with perlite or better containers, ensure complete soil saturation when watering.
Long-term Solutions: Implement consistent watering schedules, use moisture meters for accurate readings, improve growing medium drainage properties.
Light-Related Stress
Light Burn: Bleached or yellowing leaf tops, crispy leaf edges, stunted upper growth despite adequate lower growth.
Light Deficiency: Stretching (internodal elongation), pale green coloration, weak stems, slow overall growth rates.
Spectrum Issues: Incorrect light spectrum for growth phase can cause poor development and reduced yields.
Solutions: Adjust light distance and intensity gradually, ensure proper spectrum for growth phase, check for light leaks during dark periods in flowering.
Environmental Stress
Temperature Stress: Heat stress causes upward leaf curling and slowed growth, cold stress causes purpling and stunted development.
Humidity Problems: High humidity promotes mold and mildew, low humidity increases water demand and can cause leaf edge burning.
Poor Ventilation: Stagnant air increases pest and disease pressure while reducing plant vigor and growth rates.
Comprehensive Solutions: Install proper climate control equipment, monitor environmental conditions continuously, adjust ventilation systems for optimal air exchange.
Mold & Disease Issues
Powdery Mildew: White powdery coating on leaves, spreads rapidly in high humidity conditions with poor air circulation.
Bud Rot (Botrytis): Brown, mushy areas in dense buds, often starting from inside and working outward.
Root Rot: Brown, slimy roots with foul odor, usually caused by overwatering and poor drainage.
Treatment Protocol: Immediately isolate affected plants, remove infected plant material, improve environmental conditions, apply appropriate organic fungicides, increase air circulation and reduce humidity.
pH & Nutrient Lockout
Symptoms: Multiple nutrient deficiency symptoms appearing simultaneously despite adequate feeding programs.
Causes: pH drift outside optimal ranges, nutrient salt buildup in growing medium, incompatible nutrient combinations.
Testing: Test both input water/nutrients and runoff to identify pH and EC issues in the root zone.
Correction: Flush growing medium with pH-balanced water, restart with fresh nutrients at proper concentrations, implement regular monitoring schedule.
Harvest, Drying & Curing
Proper harvest timing and post-harvest processing are crucial for maximizing potency, flavor, and overall quality of your final product.
Determining Harvest Readiness
Trichome Inspection
Equipment Needed: 60x jeweler's loupe or digital microscope to examine trichome development on bud surfaces.
Clear Trichomes: Indicate immaturity - THC levels are still developing, harvest too early results in reduced potency.
Cloudy/Milky Trichomes: Peak THC production - ideal harvest window for maximum psychoactive effects.
Amber Trichomes: THC degrading to CBN - provides more sedative, body-focused effects preferred by some users.
Physical Plant Indicators
Pistil Color Changes: White pistils turn orange/brown and recede into buds as maturity approaches.
Bud Density: Flowers become dense and swollen, calyx development reaches maximum size.
Fan Leaf Yellowing: Natural senescence causes lower fan leaves to yellow and drop as plant redirects energy.
Aroma Development: Terpene production peaks, creating strong, complex fragrances specific to each strain.
Timing Considerations
Strain Variations: Indica varieties typically finish in 7-9 weeks flowering, sativas may require 10-14 weeks.
Environmental Factors: Temperature, humidity, and light intensity can accelerate or delay maturation.
Harvest Window: Most strains have a 7-14 day optimal harvest window for peak quality.
Selective Harvesting: Top colas may mature before lower branches, allowing for staggered harvest timing.
Harvest Process
Pre-Harvest Preparation
Final Flush: Use plain, pH-balanced water for final 7-14 days to remove residual nutrients and improve flavor.
Tool Sterilization: Clean all harvest tools with isopropyl alcohol to prevent contamination.
Workspace Setup: Prepare clean, well-ventilated area with adequate lighting for processing.
Timing: Harvest at end of dark period when terpene levels are highest and before lights turn on.
Cutting Techniques
Whole Plant Method: Cut entire plant at base, hang upside down for slower, more even drying.
Branch by Branch: Cut individual branches for easier handling and faster processing in limited space.
Wet Trimming: Remove fan leaves and sugar leaves immediately after harvest while still fresh.
Dry Trimming: Leave leaves on during drying, trim after - slower process but potentially better terpene preservation.
Drying Process
Environmental Controls
Temperature: Maintain 60-70°F consistently throughout drying period to prevent mold and preserve terpenes.
Humidity: Keep relative humidity at 45-55% to ensure proper moisture removal without over-drying.
Air Circulation: Provide gentle air movement without direct airflow on hanging buds.
Darkness: Keep drying area dark to prevent degradation of cannabinoids and terpenes.
Drying Timeline
Initial Phase: First 3-5 days show rapid moisture loss from outer plant material.
Stabilization: Days 5-7 moisture equalizes throughout plant material, requires continued monitoring.
Completion: Total drying time 7-14 days depending on bud density, environmental conditions, and plant size.
Readiness Test: Stems snap cleanly rather than bend when properly dried for curing.
Curing Process
Container Preparation
Glass Jars: Use airtight mason jars or similar glass containers for optimal curing conditions.
Fill Level: Fill jars 75% full to allow air space for proper moisture distribution.
Humidity Monitoring: Use hygrometers in jars to maintain 58-62% relative humidity.
Boveda Packs: Consider humidity control packs to maintain consistent moisture levels.
Curing Timeline
Daily Burping: Open jars daily for first week to release excess moisture and exchange air.
Monitoring Phase: Week 2-4 burp every 2-3 days while monitoring humidity and aroma development.
Extended Cure: Continue curing 4-8 weeks minimum for optimal flavor and smoothness development.
Long-term Storage: Properly cured cannabis can improve for months with proper storage conditions.
Resources & Legal Compliance
Always ensure compliance with local, state, and federal laws before beginning any cultivation activities. Laws vary significantly by location and change frequently.
Quality Genetics Sources
Reputable Suppliers: Source seeds and clones from established, reputable suppliers like getseedsrighthere.com for best genetics and customer support.
Strain Selection: Choose varieties appropriate for your growing conditions, experience level, and local climate requirements.
Legal Compliance: Verify all purchases comply with local regulations regarding plant counts, THC levels, and cultivation permissions.
Continuing Education
Online Communities: Join reputable growing forums and communities for ongoing education and problem-solving support.
Books & Resources: Invest in quality cultivation books and educational materials from experienced growers and horticulturists.
Local Classes: Attend workshops and classes in areas where cultivation is legal for hands-on learning opportunities.
Safety Considerations
Electrical Safety: Use GFCI outlets for all electrical equipment, properly ground all devices, and avoid overloading circuits.
Fire Prevention: Maintain proper distances between lights and plants, use appropriate ventilation, and install smoke detectors in growing areas.
Chemical Safety: Store all nutrients and pesticides safely, wear protective equipment when applying treatments, and follow all label instructions.
Record Keeping
Growing Logs: Maintain detailed records of feeding schedules, environmental conditions, and plant responses for future reference.
Legal Documentation: Keep all legal compliance documents, receipts, and plant tracking records as required by local laws.
Problem Tracking: Document any issues and their solutions to build a personal knowledge base for future grows.
Conclusion
Successful cultivation requires patience, attention to detail, and continuous learning. Start with the basics, master fundamental techniques, and gradually incorporate advanced methods as your experience grows. Remember that every growing environment is unique, so adapt these guidelines to your specific conditions and local requirements.
The key to long-term success is consistent monitoring, detailed record-keeping, and a willingness to learn from both successes and failures. Focus on creating optimal growing conditions, maintaining plant health, and preventing problems rather than constantly treating issues after they arise.

